Easiest way to remove the Windows watermark from your screen
After reading many instructions on the internet, I realize that the authors are using the same method, which is to edit registry to remove the Windows watermark on the bottom-right corner of the screen. You might not know, registry is like the heart of a Windows system. Honestly, intervention in registry is very risky and not recommend. There is a better way and not generally known, which is activate your Windows using a 180-day trial license. In this post today, we will move in this direction.
Step 1: Get the KMS client product key from Microsoft homepage.
I wrote a detailed instruction about this step before. It’s here.
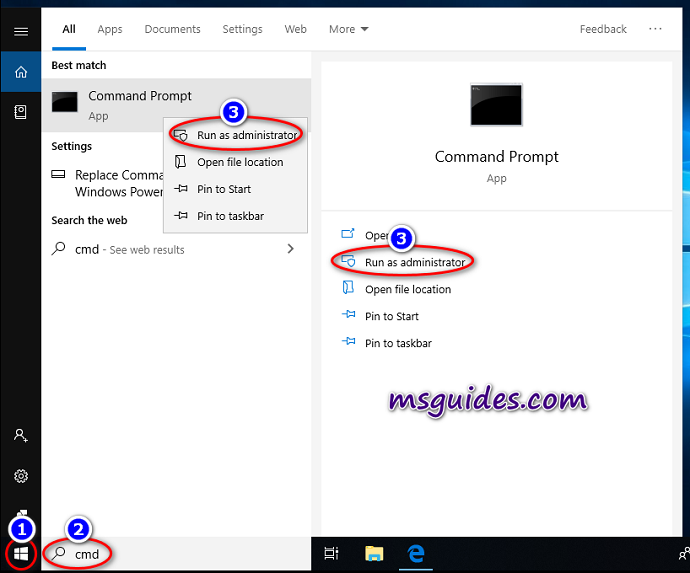
Step 2: Open command prompt as admin.
Please follow instructions here to run it with admin rights.

Step 3: Install the product key you got above. Type the command then press Enter.
In this example, I am using Windows 10 Professional so the client key here is “W269N-WFGWX-YVC9B-4J6C9-T83GX“.

Step 4: Set main KMS server.
kms8 is one of servers I have managed. You can also use other public servers on the Net if they are from a credible source.

Step 5: Activate your Windows using “ato” command.
Once your Windows is activated successfully, the watermark will be removed automatically.

Note: After following the steps above, if the watermark is not removed, it means your Windows is not activated successfully. In this case, you can create a ticket in the community or email me.
If you would have any questions or concerns, please leave your comments. I would be glad to explain in more details. Thank you so much for all your feedback and support!

tysm i came only to remove the watermark and got free win 11 pro